We’ve done our fair share of PowerPoint cover (AKA front cover or title slide) tutorials on Slide Cow, but none of them showed the power and versatility of animation.
Until now.
In this post, I’m going to show you the steps to design and animate a stunning PowerPoint cover. If you follow my steps to the letter, you’re going to get a slide similar to the one below in no time.
The Video Tutorial
Everything you need to know is in the video below. I’ve also summarized the steps in this post in case you need anything to refer to.
Step 1: Find a Picture for the Background
Every PowerPoint cover needs a high resolution, high-quality image to set the tone of the slide really, so go ahead and find one that appeals to you.
If you need a few resources where you can find such images for free, check out our list of websites that provide stunning stock images. Don’t forget to use the BARE principle when looking for the perfect picture.
Once you have an image that you can use, make sure it takes up the entire slide.
Don’t be afraid to play around with artistic styles and cool PowerPoint features either.
Step 2: Set Up The Slide
With a background image in place, it’s now time to bring in some text and shapes to the PowerPoint cover.
For my example, I went with a title, a sub-title, and a hollowed circle.
When you have all of your components on the PowerPoint cover, draw a clear line underneath them.
Warning: Technical Steps Ahead
This is the part where I explain something a little technical, and I strongly urge you to check out the video above because the text description doesn’t do this justice.
But let’s try anyway.
Duplicate the slide, and with your duplicated slide, delete everything except the white line.
Now, grab a rectangle and draw one just underneath the line so that the corners on the top barely touch the line, and the edges at the bottom barely meet with the bottom of the slide canvas.
When you’re done, hold the Control key and click on the PowerPoint cover’s background image and the rectangle, in that order. Then go to Format (Drawing Tools) > Merge Shapes > Intersect.
You should now be left with a segment of your background image. Copy it and paste it back into your original slide.
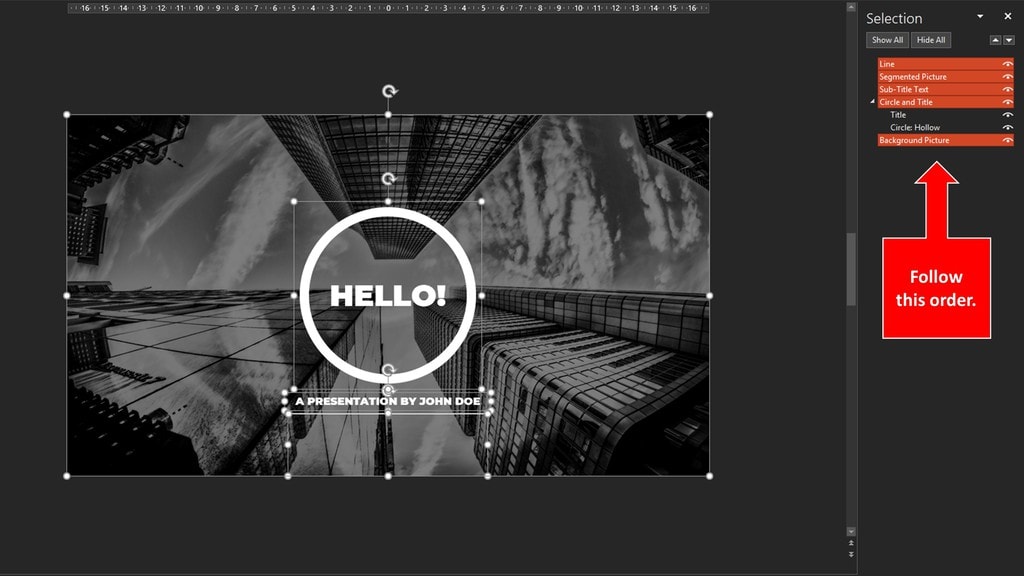
Now use PowerPoint’s Selection Pane tool (as shown in the video) to arrange all of your elements in this specific order:
- Line
- Segmented picture
- PowerPoint Elements (e.g. text, shapes, etc.)
- Background image.
Step 3: Animate
This is where you’re going to bring your PowerPoint cover to life!
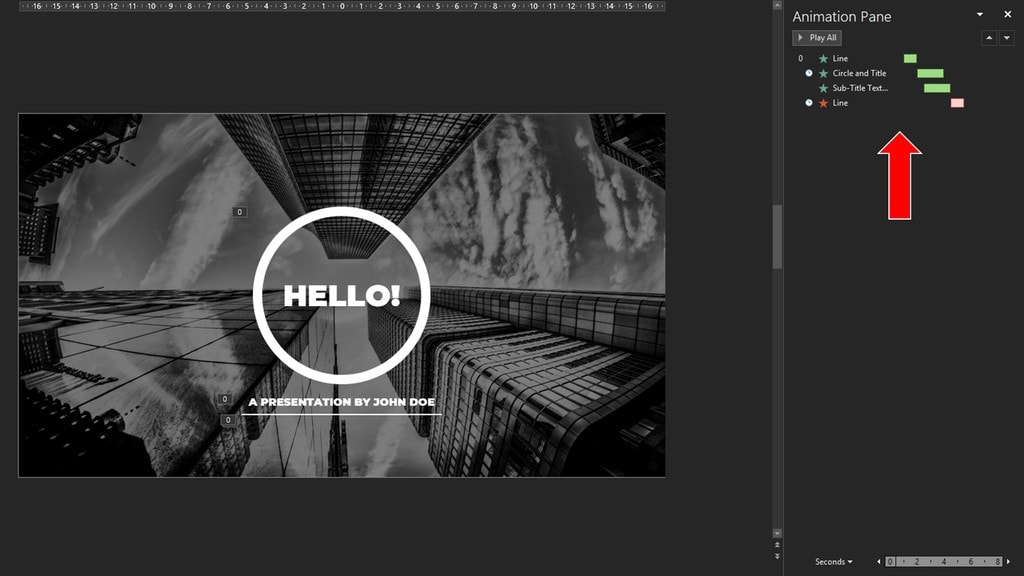
The key here is to animate your elements so that they happen one after the other.
In my example, I first animated the line with the ‘Split’ option.
I then animated the circle and text boxes with a smooth ‘Fly In.’
Finally, I used an exit ‘Split’ animation for the line to bring the slide to a close.
Be aware: You need to tweak each animation manually to enable a smooth transition between the animations. The goal is to change individual values in duration, delays, and trigger points. I was very specific in the video, and I suggest you watch that to get an idea of how I do things.
How Does Your PowerPoint Cover Look?
Did you get similar results to mine? Did you run into trouble and need a little help? Let me know in the comments section below!


Very useful and clear, thank you.
You’re very welcome!
Hi Yousef
All was going well and for the last hour I have not been able to find the merge intersect buttons?????
Hi Liz,
Can you tell me what version of PowerPoint you’re running?